Creating NFTs on Velas
Creating NFTs on the Velas blockchain provides teams with a number of advantages. These include the ability to use Ethereum-compatible smart contracts, lightning-fast transaction speeds without high gas fees, and much more.
Please be aware that this tutorial will show you how to create a one-of-one NFT instead of a collection. So this smart contract will enable users to mint any of their photos or videos as an NFT.
Prerequisites
To follow along, you should have Node plus Yarn, the package manager. Also, you should have basic knowledge of Solidity. So if you are not familiar with it, please equip yourself with the basics of Solidity and Hardhat first.
Setup
To set up our project, execute the following command in the terminal.
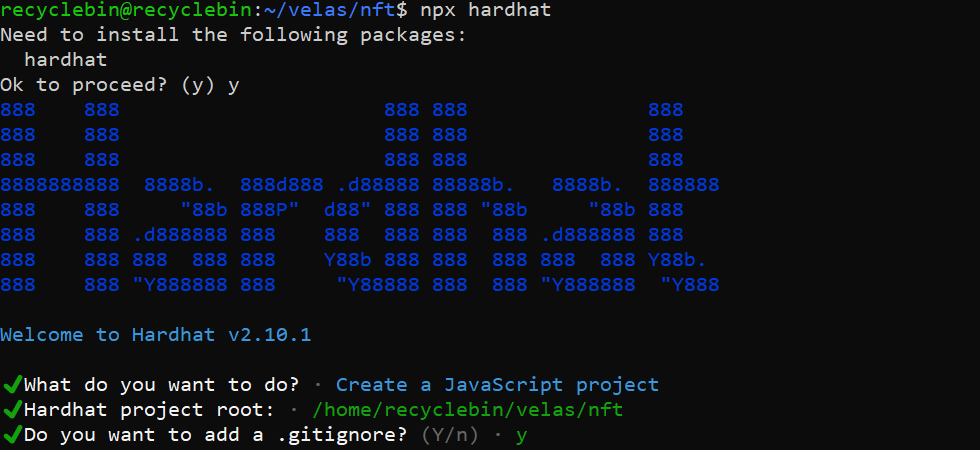
npx hardhat
You will see the following output if you don’t have Hardhat installed.

Type y and click enter, and it will proceed to install the Hardhat.
However, if you have Hardhat already, it won’t show you the prompt for Hardhat installation.
Instead, it will ask some questions about how you want to set up the project.
We want a basic Javascript project in our current folder so just click enter for everything.
Then we have to install our dependencies for the project. To install those, we will use the following command.
npm install --save-dev "hardhat@^2.10.1" "@nomicfoundation/hardhat-toolbox@^1.0.1" "@openzeppelin/contracts" "dotenv"
As we are using Yarn, we have to install libraries that hardhat-toolbox uses.
yarn add --dev @nomicfoundation/hardhat-toolbox @nomicfoundation/hardhat-network-helpers @nomicfoundation/hardhat-chai-matchers @nomiclabs/hardhat-ethers @nomiclabs/hardhat-etherscan chai ethers hardhat-gas-reporter solidity-coverage @typechain/hardhat typechain @typechain/ethers-v5 @ethersproject/abi @ethersproject/providers
If you’re using npm version 7 or later versions, these libraries will be installed directly.
It is worth noting that we need to take one more step before writing a smart contract. That is to remove any .sol files you see in the contracts folder and create a new file called VELASNFT.sol. This is the folder where we will write our contract.
How to write an NFT smart contract
Constructor
To start with, we will create a barebone smart contract where we define the solidity version and create an empty smart contract body.
// SPDX-License-Identifier: MIT
pragma solidity ^0.8.9;

contract VELASNFT {

}
We have to import a base smart contract and a utility smart contract. Notably, these are the contracts that will use to build our NFT smart contract. The base contract is ERC721URIStorage, an ERC721 implementation with storage-based token URI management.
Counters is a utility contract that will be used to count the number of NFTs minted.
import "@openzeppelin/contracts/token/ERC721/extensions/ERC721URIStorage.sol";
import "@openzeppelin/contracts/utils/Counters.sol";
Our contract will inherit the base contract. This will allow users to access all the functions of the base contract and our smart contracts.
contract VELASNFT is ERC721URIStorage {

}
Now we can write constructor for our contract. Notably, our constructor won’t have any arguments, but you have to pass the name and symbol to the ERC721 constructor.
constructor() ERC721("VELASNFT", "VN") {}
At the end of this step, your smart contract should look like this.
//SPDX-License-Identifier: MIT
pragma solidity ^0.8.0;

import "@openzeppelin/contracts/token/ERC721/extensions/ERC721URIStorage.sol";
import "@openzeppelin/contracts/utils/Counters.sol";

contract VELASNFT is ERC721URIStorage {

    constructor() ERC721("VELASNFT", "VN") {}

}
Writing the mint function
For the mint function, we need to set up the counter first. Paste the following snippet inside the contract above constructor.
   using Counters for Counters.Counter;
    Counters.Counter private _tokenIds;
We assign all the functions of the Counters library to the Counter struct. Then we will create a private variable called _tokenIds.
Now let’s start to develop the function. It will take one argument: tokenURI, and it will be the url to the json file which stores all the metadata. We will get more into metadata in the following sections. The mint function will have public visibility and will return the ID of the minted NFT, which will be type uint256.
function mint(string memory tokenURI) public returns (uint256) { }
Inside the function, we will first get the current count of the counter.
To mint an NFT, we will use _mint function which takes address and ID as arguments. For address, we will use the address of the caller, and ID will be the current count. After that, we have to save the tokenURI.
To do that, we have to _setTokenURI, which will save URI with the corresponding ID as a key. In the end, we will increment the counter, and then the ID of the created NFT.
function mint(string memory tokenURI)
        public
        returns (uint256)
    {
        uint256 newItemId = _tokenIds.current();
        _mint(minter, newItemId);
        _setTokenURI(newItemId, tokenURI);

        _tokenIds.increment();
        return newItemId;
    }
Congratulations! Now your smart contract can mint NFTs! Here is the overview of the whole contract.
//SPDX-License-Identifier: Unlicense
pragma solidity ^0.8.9;

import "@openzeppelin/contracts/token/ERC721/extensions/ERC721URIStorage.sol";
import "@openzeppelin/contracts/utils/Counters.sol";

contract VELASNFT is ERC721URIStorage {
    using Counters for Counters.Counter;
    Counters.Counter private _tokenIds;

    constructor() ERC721("VELASNFT", "VN") {}

    function mint(string memory tokenURI)
        public
        returns (uint256)
    {
        uint256 newItemId = _tokenIds.current();
        _mint(msg.sender, newItemId);
        _setTokenURI(newItemId, tokenURI);

        _tokenIds.increment();
        return newItemId;
    }
}
How to deploy the contract
We have built our NFT smart contract. Here comes the exciting step, deployment. But before deploying the contract, we need to compile it and write a script that deploys the contract. To compile the contract, run the following command in terminal.
npx hardhat compile
You will see the following output.

Now let’s move on to the next stage, writing a script for deploying this smart contract. To do so, we will go to the scripts folder and open the deploy.js file. Then, remove all the content and paste the following snippet into that file.
const hre = require("hardhat");

async function main () {
  // We get the contract to deploy
  const VELASNFT = await hre.ethers.getContractFactory('VELASNFT');
  console.log("Deploying NFT contract...");
  const velasnft = await VELASNFT.deploy();
  await velasnft.deployed();
  console.log('NFT contract deployed to:', velasnft.address);

}

main()
  .then(() => process.exit(0))
  .catch(error => {
    console.error(error);
    process.exit(1);
});
Before deploying the contract, we have to add details about Velas testnet to hardhat.config.js file. Open the file and add Velas testnet configuration.
require("@nomicfoundation/hardhat-toolbox");
const dotenv = require('dotenv');
dotenv.config();

/** @type import('hardhat/config').HardhatUserConfig */
module.exports = {
  solidity: "0.8.9",
  networks: {
    velastestnet: {
      url: `https://evmexplorer.testnet.velas.com/rpc`,
      accounts: [process.env.PRIVATE_KEY]
    }
  }
};
It is also worth mentioning that before deploying the contract, you have to add private keys for your wallet to the .env file and have some testnet VLX token in the wallet. Read more how to get testnet tokens.
Now that we have all things set up, run the following command in the terminal.
npx hardhat run scripts/deploy.js --network velastestnet
If the command is executed successfully, you will see the output similar as shown below in your terminal.

Mint the NFT
As the smart contract is deployed, we can mint the NFT from the terminal. To do that, first start the hardhat console using the following command.
npx hardhat console --network velastestnet
The output are shown below.

Then we will create the contract variable called “velasnft”. The getContractAt method will return the contract object.
const velasnft = await ethers.getContractAt("VELASNFT", '0x587133187DEC8E1D5a964254B42FF3627a649313')
Please refer to the output shown below.

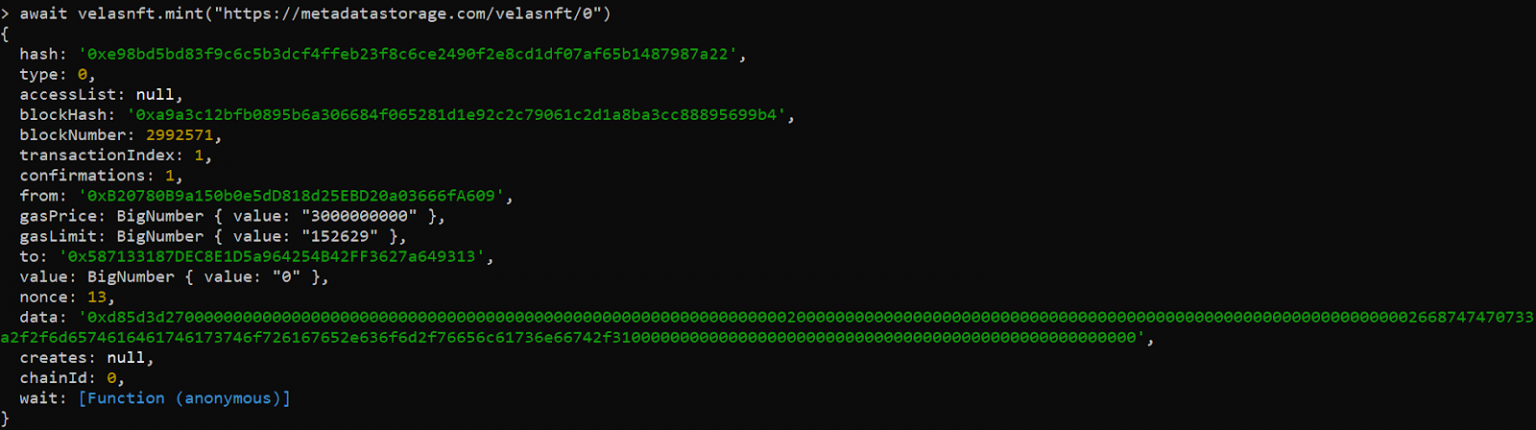
To mint the NFT, we will use the mint method of the velasnft variable. We also have to pass the link for metadata to the method. You can read more about Metadata standards HERE.
await velasnft.mint("https://metadatastorage.com/velasnft/0")
Check out the output below.
Now it’s time to check the owner of the NFT. Since we minted using the ownerOf method, now let’s pass the index of the NFT we minted.
await velasnft.ownerOf(0)
That’s how we get the result of the NFT owner.

Conclusion
In the article, we have learned how to write an NFT smart contract that allows users to mint NFTs. In addition, we have managed to deploy it on Velas testnet. Now, you can develop new NFT-powered applications and explore the dynamic Velas ecosystem.